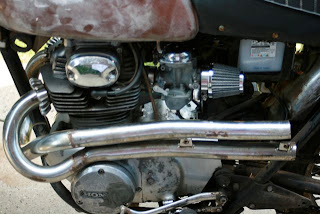
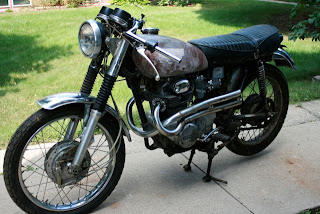
I was going to re-wire the entire electrical system. Seriously, I was considering that.
I'm still considering it, but not now, not if I'm going to get the bike running in time for the fall run.
You see, it won't idle, and it was occasionally blowing fuses (the one fuse), and I was fearing that there was some intermittent short somewhere buried in the wiring harness.
However since then I've disconnected the lead from the battery to the electric start system (yes there are two wires that clamp to the positive lead of the battery, one thick one for the electric start and a thin one for the rest of the electrical system) it hasn't blown the fuse, and I'm using a 7.5 in there instead of a 15 amp fuse, so current draw must be well within the realm of safety, right?
So for now I'm going to pretend like that little electric bugaboo doesn't exist and move on with troubleshooting the idle problems as if the electrical system is sound. So I'm moving on to things like points, air leaks, etc.
The carbs are often to blame for these problems but since I rebuilt them I'm leaning away from that. I'm going to start by checking for leaks at the intake manifold and move on to points/condenser next.
I do however need to tidy up the electricals a bit even if I don't plan on re-wiring the whole thing. At the moment the two cables that used to be threaded inside the handle bars are both sticking up from the gas tank with several wire nuts (of the wrong size, for sure) securing enough wires together to run the headlight on low and convince the motor that the kill switch is in the un-killing position. At a minimum I'd like to tie these two to a pair of switches so I can turn the motor off in the event of an emergency (I guess I could use the key…) and it would be nice to kill the headlight when I'm starting it, at least until it starts easier than it does now. As far as the rest of the wires are concerned, I think I'm just going to cap them off for now and tuck them away somewhere so they don't look so bad; I hate to cut them off in the event that I need to mess with them for troubleshooting (the tail light still doesn't work quite as it should). We'll see.
Of course I could just pull the tank and concentrate on getting that painted, and some other chassis/cleanup work that is in order and pretend like these engine problems are minor and leave them for later…that would be prudent eh?
Tuesday, August 26, 2008
Friday, August 22, 2008
Rebel Yell
I got to spend about 1.5hrs on the bike last night so I checked the Kreem in the tank (which was completely dry) and tested for leaks...no leaks. Then I tested the "balancing" tubes and one was clogged, but after about 10 minutes and piece of wire I was able to get a reasonable amount of fuel to flow out of it. I pulled the petcock (the old one) to see if there was any obstruction there and all of the fuel poured out, so that looked good.
I then moved to "tying up" what I could in the electrical system for an attempt at starting the thing later. Essentially I tied enough wires together to simulate the kill switch being in the "run" position and to put the headlight on "low". Through this process I noticed all sorts of weird behavior, sometimes the running light of the tail light would be on, other times it would be off but would activate when I applied the brake, but never both at the same time.
So, once the electricals were satisfactory I screwed in the new petcock and plumbed the tank. The fuel filters I got are too big for the fuel line I have so I left them out (the new petcock has a nice new strainer so I figured I was at least partially safe). I had a major hassle getting that balancing line connected (I think those tubes have a slightly larger outside diameter than the rest of the system, so I should get some bigger hose) and then it started to rain.
I didn't give up however and got the hose attached in the garage. The rain let up so I pulled the bike back out and took a shot at starting it. After about a dozen kicks it backfired (which greatly impressed Lib) and then after a few more it sprung to life. This time I had the sense to observe the tach and it seemed like I could bring the RPM's down to about 3000 but any lower and the thing dies.
Remembering that 3000 is about where the alternator starts making power, I decided to check the battery since below 3k the bike isn't generating enough power to throw a spark. Sure enough, just slightly more than 10 volts.
So I threw it on the charger last night thinking that if it ran at all with 10 volts maybe it would run great at 12-13, and even though that battery is smoked, it can usually hold a charge for an hour or so after it comes off the charger.
This morning I gave it another shot before coming in to the office and while it definitely starts easier and I can get the revs down closer to 2k, it still won't come close to idling, and when I try to hold the revs steady (around 3.5k), there is some "undulation".
So, I've got some research to do. I read somewhere that getting these bikes to idle w/o the stock exhaust is difficult, but I've seen many with modified pipes so that can't be the only cause. There are so many other possibilities but I'm going to try and narrow them down, otherwise I could spend a long time getting everything perfect.
But it was cool to hear it run again, and I think my tank nightmares are over, so I'm not complaining.
Tuesday, August 12, 2008
Grinding Disraeli Gears, Part 2
Where was I...oh yes.
So the next day I checked the tank filled with the "A" solution and things looked pretty clean, so I got ready for the next step.
The instructions indicate that you need to get the "A" stuff out, add the "B" and then immediately add "C" once you emptied the "B" stuff out (as rust will set in immediately.
After yesterday's "B" before "A" debacle, I only have about half a bottle of the "B" solution, and even that is somewhat nasty and rusty, but since I don't have alot of choice (and I'm growing ever more comfortable with the idea of replacing the tank anyway), I'm just going to go for it and see what happens.
So I pour the "A" + water solution and add what's left of the "B" bottle. This smells horrible and I slosh it around as best as I can. Following the directions, I get the can of "C" ready to go and quickly pour it into the tank.
As I slosh the white good around in the tank I notice that it is a bit runny...and rusty colored...
Finding yet one more way to screw this up, I added the contents of the "C" can without first emptying the "B" solution from the tank...brilliant!
After coating the tank as much as I can I decide to move on to something completely different and here I can say things went much better.
You may remember the surprise I had when I tried to swap out the handlebars in a previous post? Today I was ready to go to town with the wire cutters and make the swap. After some careful cutting, re-routing of control cables and Dremel work, the new bars were in place (and looking pretty sweet, I might add).
The Kreeme had one more trick up its sleeve for me. The next day I wanted to see what the bike would look like with the tank on, and I tested it several times to see if the coating had set up. No matter what I did I couldn't get any more to drip out, so I popped the tank on the bike. No sooner than a second or two after I got to marvel at the progress the Kreem decided to flow again and emptied out of the tank and on to my nice clean carburators...
I'm glad this part is almost over.
Monday, August 11, 2008
Grinding Disraeli Gears, Part 1
I’m going to start this post right away (although I might not post it right away) while the details are fresh in my mind.
For two weeks I tweaked on the process of restoring a rusty gas tank using the Kreem product. I read tutorials, watched videos and talked to people who have done this before but no matter what I had this bad feeling about the process.
Finally on Saturday I had some time to get started and since I had scheduled most of Sunday to work on the bike I thought it would be cool if I could get the preliminaries out of the way and get the Kreem in the tank and drying by Saturday night. The tank needs some work on the outside as well and the idea was to combine as much of this as possible since there is a lot of waiting involved.
The first part of the Kreem process is plugging the holes in the tank. I wasted a lot of time on this and in the end made probably the worst possible choices. I decided to leave the petcock in, since when I pulled it I found that it was barely functional and very rusted out. It’s going to need to at least be rebuilt (if not replaced) so I was comfortable with sacrificing it to the process.
The other two holes I was concerned with are two steel lines that come out of the bottom of the tank on either side. When the tank is on the bike, these two are connected with a piece of hose that runs through the frame so it has to be removed when the tank is off the bike. Here I came up with the brilliant idea of connecting these two with a short length of hose for the etching process and then using a length of wire in each to keep them open when applying the Kreem coating itself.
The Kreeme kit I got came with three containers labeld A, B and C. This should be simple enough, but for some reason I can’t explain I managed to dump bottle B in the tank first.
I told you I had a bad feeling about this.
I noticed this just as the bottle became empty and scrambled to recover as much of the (now rusty) liquid into its original container. After a scene that would make the three stooges proud, I got about 50% of it back.
I still can’t figure out how I screwed this up, I literally ran the steps through in my head a dozen times and read and re-read the directions over and over again. Amazing.
This time I add the right bottle, and then add additional hot water (as directed) and the tank is almost full. I let this mess sit for a few minutes and then, realizing that there isn’t much more I can do at this point turn my attention to the outside of the tank.
The plan here is to strip the paint, apply some bondo to cover the mounting plates for the emblems and then prime it for painting. Since the whole mess is nicely suspended on a 5-gallon pail I decide this is a good time to apply some paint stripper. This goes well and the paint begins to bubble up immediately (I use “Dad’s”, I haven’t used too many others but I prefer it to Zip Strip). After about 15 minutes most of the paint is falling off or close to it and a quick swipe with the putty knife removes almost all of it, revealing something interesting.
I’m not the first person to Bondo this tank.
On the front-left side of the tank is a patch of Bondo about four inches in diameter. On the opposite side is one about an inch around. I’ve know that the bike was down before I got it based on damage to the right-hand side of the engine, turn-signals, etc. but I didn’t know that the tank had been repaired. This was great news for me because it makes me more comfortable with screwing up the restoration of the tank, knowing that it’s not exactly in “new” condition.
Some steel wool and alcohol removes most of the paint and primer, enough for the Bondo to get a good grip (I think, I’ve never used it before) and so I give it a water rinse and let it dry. I take this chance to “agitate” the Kreem “A” stuff in the tank and when I take a peek it looks like it might actually be working.
I’m feeling more confident now so I decide to jump into the Bondo task once the tank is dry.
Bondo is cool stuff, I’ve never worked with it before and using nothing more that the directions on the can I had a very tenuous grip on the process but went at it anyway, with gusto. Other than getting too much of it on my Mechanix Gloves, it went well enough (I found out a little goes a long way). Using the included tool, I applied a fairly thin layer, just enough to cover up the mounting plates, to either side of the tank and let it dry. I applied a little more after the first layer seemed to set up so that there would be more of a “safety zone” when the time comes to sand this down.
Another agitation of the tank, it’s looking a little better now…
According to the directions they recommend 24 hours for an old tank, so that’s what I’m going to give it; I’ll leave B and C for Sunday…
Friday, August 1, 2008
Reserves Day 1
Last Sunday Matt came over with the camera and all told I spent a solid six hours working on the bike. In the morning I extracted it from my Tetris-like garage arrangement, setup an improve workbench and went through the day’s work in my head.
Before Matt arrived I started out with a few small adjustments to the recently overhauled carburetors. I thought there was a more thorough procedure outlined in my Clymer manual but most of the adjustment requires the bike to be running so that will have to wait.
Since we’re going with individual “pod”-style air filters one of the tasks on today’s agenda is removing the existing airbox. This was pretty straightforward once I realized that the two sides of the box are connected to each other using a rod that goes between the two sides. After bending the rod and denting one side of the airbox I realized this, removed the nut from one end and the whole thing fell away nicely. This really opened things up under the seat and there is now a lot more room to work with (which will make mounting the carbs a lot easier) but there are a few brackets and tabs and such that I think can go, later.
Since I needed some pipe clamps (on the list for the Fleet Farm run when Matt arrives) to mount the carbs I decided to move on to something easy like swapping out the handlebars. The CL come with these cool MX-style bars but I have a pair of even-cooler clubman bars I bought for my Monster years back but they didn’t fit.
I sliced the left grip to remove it and the pulled the screws from the left-side controls. For some reason, they didn’t just fall off at that point. I attributed this to decades of goo but after moving it around a bit I realized something more discouraging: all of the electrical for the hand controls are threaded through the handlebars.
I took a minute to contemplate what this meant and came to a few conclusions. The first was that it was very unlikely that the current wiring would be of the proper length for the new bars, so I’d be looking at extending it. If I’m going to extend it, I want to cut it back to a point where I could add a water-tight connector and hide it away, so that means back by the speedometer and tach. It also means I’ll need the connector itself, the wire, some way to “wrap up” the individual leads and I’ll be re-wiring the controls as well.
I was just about to cut the first wire when I realized that if I started this process now there was little-to-no chance the bike would run today. I didn’t have any great expectations that it would run anyway, but if I dove into this re-wiring effort (which required parts I didn’t have on hand) that there would be little chance of having everything in place to try and fire up the engine.
So instead I grabbed the Simple Green and started scrubbing until Matt arrived.
When Matt got there we grabbed a couple of cups of Black Gold and I went over the plan. We headed to Fleet to pick up a new battery, hose clamps, air filters and a fuel filter.
We returned with some hose clamps, a fuel filter (for a lawn tractor) and a battery charger (mine had burned up recently and I thought for $25 it would be worth a shot to try and revive the battery). I threw the battery on the charger and started the re-assembly with the carburetors. With the airbox removed this went quickly and easily and with the newly-cleaned carbs the throttle action was much improved (although I still need to at least lubricate the cable if not replace it at some point).
Once that was done I realized that I still had to hang the pipes and as I got started with that Matt grabbed the camera and started rolling. It had been awhile since I played with mounting the exhaust but after a few botched attempts I remembered how the two-piece flanges went on and the pipes were back on the bike.
Since they are considerably shorter than before the mounts that previously supported them no longer make sense, so for the moment they are simply bolted to the head. I imagine this isn’t a long-term solution.
With the carbs back on and the pipes hung, we were ready to drop in the battery, apply fuel and attempt to fire up the engine. I checked on my old battery and according to the charger it was almost done (one remaining bar on the 5-bar charge indicator). Thinking optimistically I pulled the battery off the charger and dropped it in the bike; there was almost no response. Realizing this was futile I pulled the battery and put it back on the charger, I had considered this possibility earlier in the week and had a plan B.
Matt and I both had the same thought as we eyed up my new bike, the Magna.
After learning the hard way how to get the battery out of the Magna we yanked it and set it up next to the CL. I found a pair of jumper cables in the garage and quickly attached them to the battery terminals of the bike, and then to the battery itself. I quick turn of the key indicated that the CL’s electrical system was not to blame for the previous batteries performance and the bike turned over without strain.
Next I dug out the Fuel IV previously mentioned on these pages and realized that the only gasoline I had on hand was from the last attempt at starting this bike, last summer. So, Matt and I headed to the corner gas station to buy about a half-gallon of gas and then headed back to the garage.
With the fuel lines connected I added a small amount of fuel to the IV and watched for leaks. Things looked pretty tight (before fuel would pour out of one of the bowls) so I turned the key, set the choke and hit the starter…
…nothing.
I was hoping that the reason we didn’t see a leak was not because there was no fuel flowing through the carbs. Let’s try again.
…nothing.
Maybe it doesn’t need the choke?
…nothing
The last time I turned the bike over I tested the ignition and there was spark, but that was months ago so we verified this the old fashioned way. Spark on both sides, but the plugs seem dry. I added more fuel to the IV (it was now started to drip from one of the bowl drains, at least it’s coming out of the right place right?). We also decided to try the kick starter.
As a side note, if you’re trying to start a bike that hasn’t run for at least a decade, and you’re using the kick starter, wear boots. After about ten kicks (and a few slips) I thought that little metal rod (the remains of the kick starter pedal) was going to go through the bottom of my Chucks’.
Envision this: The CL is on its center stand, there is a battery laying next to it and jumper cables are running up to the battery compartment. I’m standing on the right-hand side of the bike, holding the Fuel IV in one hand (dripping gas), the throttle in the other and I’m trying to kick the kick starter with my left foot (the wrong foot) repeatedly, wearing tennis shoes…
…and then we heard a “pop”…
More furious kicking…
…pop, pop, pop
I kick a few more times and then my leg falls off. It’s time to get some boots.
Back outside in 5 minutes with the most reliable equipment ever made by HD on my feet, I turn the ignition back on, refill the IV and start kicking with various amounts of throttle, choke and prayer and…well you can see the results for yourself:
Subscribe to:
Posts (Atom)